

The left-hand stalk operates most of the external lights.
The external lights can only be switched on when the ignition key is at MAR. The instrument panel and the heating/ventilation (or climate control system) controls and the cigar lighter ring will come on with the external lights.
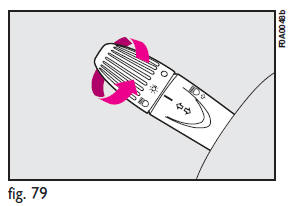
Side/taillights fig. 79
These come on when you turn the ring from
 Instrument panel warning light
 will come on.
Dipped beam headlights fig. 80
These come on when you turn the knurled switch from
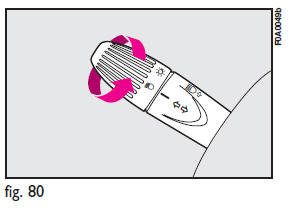
IMPORTANT
The dipped beam headlights will automatically be switched off when the main beam headlights are switched on if the front fog lights are on.
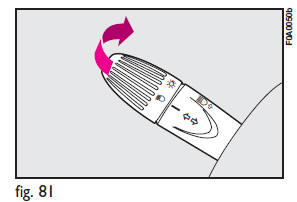
Main beam headlights fig. 81
Push the stalk from position  towards
the dashboard to switch the headlights on.
towards
the dashboard to switch the headlights on.
Warning light  on the instrument
panel will turn on.
on the instrument
panel will turn on.
Pull the stalk towards the steering wheel to switch the lights off.
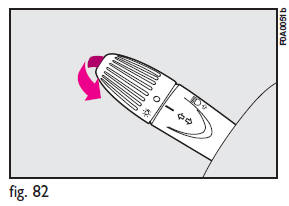
Flashing the headlights fig. 82
Pull the stalk towards the steering wheel (unstable position).
Warning light on the instrument panel
will turn on.
Direction indicators fig. 83
Move the stalk as follows:
up - to switch on the right-hand direction indicator down - to switch on the left-hand direction indicator.
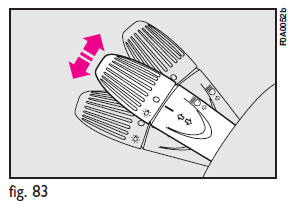
Instrument panel warning light  or
or
 will come on flashing.
The direction indicators will automatically be switched off when the vehicle is straightened out.
If you wish to signal a lane change where only a slight movement of the steering wheel is required, move the stalk up or down without pushing it far enough to make it click. The stalk will return to the neutral position as soon as it is released.
See also:
Fluid Capacities
...
Installing the tow hook
The towing device should be fastened to the body by specialised personnel according
to any additional and/or integrative information supplied by the Manufacturer of
the device.
The towing device ...
General Information
• You can launch the vehicle from a stop in first, second, or third gear. The
system will ignore attempts to shift into a higher gear if the engine speed is too
low. An audible beep will sound if ...