

The system set-up consists of:
– a dual-purpose aerial (sound system + cellular phone), on the vehicle roof;
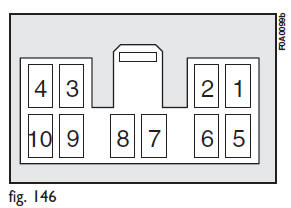
– a dual-purpose aerial connection wires and ten-pin connector wiring fig. 146.
– a double coil speaker (sound system + cellular telephone), located on the passenger side dashboard.
![]() Maximum power to be applied to the aerial is 20W.
Maximum power to be applied to the aerial is 20W.
Wiring diagram:
1 Sound system mute function.
2 Spare.
3 Cellular phone input earth signal.
4 Cellular phone INPUT signal.
5 Dual-purpose speaker on the front passenger side door (+).
6 Dual-purpose speaker on the front passenger side door (-).
7 Ignition switch power (+15).
8 Spare.
9 Battery power (+).
10 Earth.
Have the cellular telephone and the connections performed by a Fiat Dealership only.
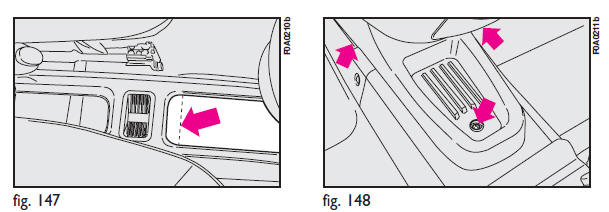
In Fiat Doblò passengers Transport versions, use a screwdriver in the point shown in fig. 147 to reach the ten pin connector. Lift the central tunnel cover and remove the connector.
In Fiat Doblò Cargo versions, loosen the screws shown in fig. 148 in the glove compartment to reach the ten pin connector. Use a screwdriver in the pre-cut point and remove the connector.

Purchase a free-hands kit which is compatible for your cellular telephone.
Have the cellular telephone installed and connected to the setup system in the vehicle by a Fiat Dealership only. This will ensure the best results and prevent any problems which could effect vehicle safety.
See also:
Multifunction display
The “Multifunction display” shows all the useful information necessary when driving,
more particularly: ...
Dealer Service
Your authorized dealer has the qualified service personnel, special tools, and
equipment to perform all service operations in an expert manner. Service Manuals
are available which include detailed ...
To Unlock The Doors And Liftgate
Press and release the UNLOCK button on the RKE transmitter once to unlock the
driver’s door or twice, within five seconds, to unlock all doors and the liftgate.
The turn signal lights will flash to ...