

Versions with one sliding side door (on passenger side)
From passenger’s side: open the sliding side door.
From driver’s side: pull handle Ffig. 59a upwards to tip the seat back.
Once you have let go of the lever, check that the seat is firmly locked in the runners by trying to move it back and forth.

![]() In the event of an emergency, you can get out of the rear seats from the driver’s
side by tilting the driver’s seat.
In the event of an emergency, you can get out of the rear seats from the driver’s
side by tilting the driver’s seat.
Versions with two sliding side doors
Open either of the two sliding side doors to access the rear seats.

You cannot open the left-hand sliding side door while refueling when the flap is open (see “At the filling station” in this section).
7-seat versions
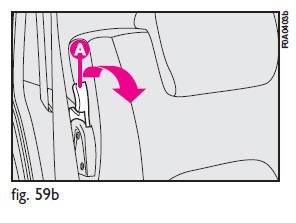
To access the third row:
– open the side sliding door;
– lower the head restraints (if set in the normal position of use) (see paragraph
“Head restraints”);
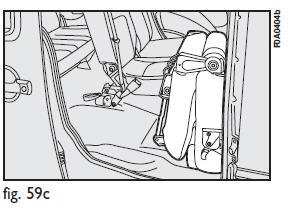
– release lever A-fig. 59b and fold the seat forward onto the cushion;
– raise the whole cushion fig. 59c.
To get out of the vehicle, reverse the above operations and make sure head restraints are lowered.
IMPORTANT
It is forbidden to travel with the second row seats tipped and third row seats set in normal position of use. More particularly, if the central seat of the second row is tipped and that of the third row is set in normal position of use, a buzzer will sound to indicate the wrong seat position.
![]() It is absolutely forbidden to travel with the second row seats tipped and
passengers seated on the third row seats (as specified on the seat label).
It is absolutely forbidden to travel with the second row seats tipped and
passengers seated on the third row seats (as specified on the seat label).
See also:
Traction Grades
The Traction grades, from highest to lowest, are AA, A, B, and C. These grades
represent the tire’s ability to stop on wet pavement, as measured under controlled
conditions on specified government ...
Buzzer volume (Buzzer Vol)
The volume of the buzzer accompanying any failure/warning indication can be adjusted
according to 8 levels. The buzzer can be adjusted and, in certain cases, it cannot
be excluded. To adjust the v ...
Rear light unit
To change the bulb, proceed as follows:
❒ from inside the car, remove the upper plastic cover (A) with the screwdriver
provided to reach fastener (B);
❒ from inside the boot, fit ...