

Proceed as follows:
❒ Following the procedure described previously, raise the car and remove the
spare wheel;
❒ Make sure the contact surfaces between wheel and hub are clean so that the fastening
bolts will not come loose;
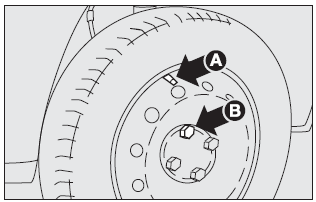
❒ Fit the standard wheel by inserting the first stud (B) for two threads in the
hole closest to the inflation valve (A);
❒ for cars fitted with press-fit wheel cap, press the cap edge with your palms (without
hitting it) against the wheel;
❒ Fit the wheel cap, making the symbol C (on the back of the cap) coincide with
the inflation valve and fit the other three bolts;
❒ Fasten bolts using the wrench provided;
❒ Lower the car and remove the jack;
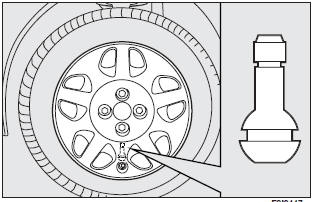
❒ fasten the bolts in the order shown above.
IMPORTANT Incorrect fitting may cause the wheel cap to come off when the car is travelling.
When you have finished
❒ Stow the spare wheel in the space provided in the boot;
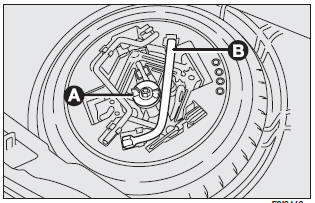
❒ Refit the jack in its support as shown on the tool container;
❒ Put the tools back into their places in the container;
❒ Stow the container complete with tools on the spare wheel;
❒ Fasten the tool container retainer (A).
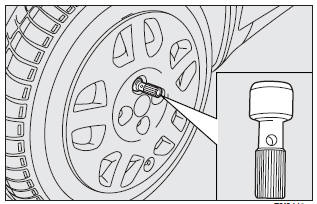
Use the extension shown in the figure to fasten or loosen the inflation valve.
IMPORTANT Do not use inner tubes with Tubeless tyres.
See also:
Overview
Meet the Fiat Doblò, the new Fiat that is all about space. A space to be
shared with family and friends, a liveable space for travelling and socialising,
for whoever chooses the Fiat Dobl&o ...
How to keep the seatbelts in proper working order at all times
1) When wearing the seat belts, always ensure they are not twisted and are free
to wind in and out.
2) Following a serious accident, replace the belt being worn at that time, even
if it does not ...
Ignition Key Removal
1. Place the shift lever in PARK (if equipped with an automatic transmission).
2. Turn the ignition switch to the ACC/ON/RUN position.
3. Rotate the key to the OFF/LOCK position.
4. Remove the key ...