


FASTENERS
3-door versions
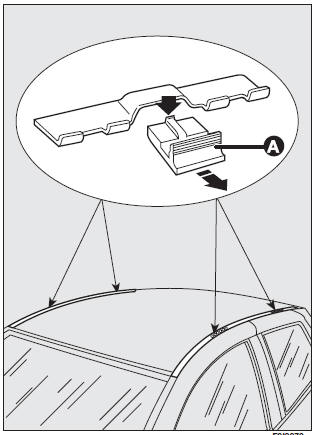
Move the seal aside in the points shown in the figure to reach the fasteners.
The rear fasteners are in the areas indicated by the printed
 reference mark O on the rear side windows.
To make use of the presetting couplings, remove the retainer (A) by operating on the relevant catch as shown in the figure.
5-door versions
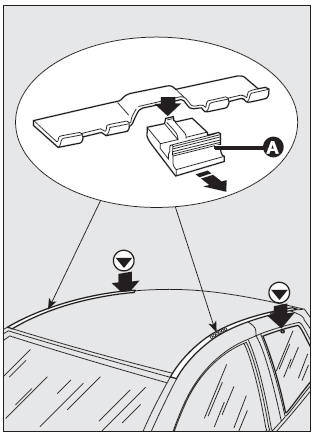
Move the seal aside in the points shown in the figure to reach the fasteners.
The rear fasteners are in the areas indicated by the printed reference mark
on the rear side windows.
Attach the roof rack brackets to the fasteners.
To make use of the presetting couplings, remove the retainer (A) by operating on the relevant catch as shown in the figure.
After few kilometers, check that fastening screws are firmly tightened.
IMPORTANT Follow the instructions provided in the kit to the letter for both versions (3 and 5 doors).
Fitting should be entrusted to skilled personnel.
IMPORTANT Never exceed the max. permissible loads (see section “Technical specifications”).
See also:
Fixed passenger seat
Adjusting the reclining seat back
Lift lever A-fig. 52.
...
Radial-Ply Tires
WARNING!
Combining radial-ply tires with other types of tires on your vehicle will
cause your vehicle to handle poorly. The instability could cause an accident. Always
use radial-ply tires in se ...
CD MP3 Player
Introduction
This chapter describes the operation of the CD MP3 player.
NOTE: Layer-3 audio decoding technology is licensed from Fraunhofer IIS and Thomson
multimedia.
MP3 Mode
In addition to p ...